eSurveyCreator is now SurveyHero

Up until now, we have been running two separate online survey platforms, namely eSurveyCreator and SurveyHero.

Today we are excited to announce that we have merged eSurveyCreator into SurveyHero (https://www.surveyhero.com). This will allow us to strengthen our brand and to prevent confusion.

The brand SurveyHero is not only shorter, but we do believe it is also more memorable than eSurveyCreator. Along with this rebranding, we have also freshened up our website with a new design.

If you have an eSurveyCreator account, then nothing will change for you, except that you and your survey participants will be redirected to surveyhero.com. All of your surveys, survey links, etc., that you may have already shared, will continue to work. You can also continue to share “old” survey links that use the domain esurveycreator.com.

Enterprise customers using a White Label solution will not be affected either. All survey links using a custom domain will continue to work unchanged.

This is the first step in a series of improvements that we have been working on for a long time and we look forward to bringing you more updates soon.

Please do not hesitate to contact us at support@surveyhero.com should you have any questions.

Can I integrate hyperlinks into the questionnaire?

There are the following options to add hyperlinks to a survey:

Link words / sentences

To do so, you simply have to enclose the respective text with the below mentioned code:

[url=http://www.domain.com]text[/url]

Let’s assume you have the sentence “To get more information, please click here” in your questionnaire and the participants should be redirected to https://www.esurveycreator.com by clicking on “here”. Just add this sentence according to the example beneath to your survey:

To get more information, please click [url=https://www.esurveycreator.com]here[/url].

The result will look like this: To get more information, please click here.

Write out links in full

Hyperlinks can be added to the questionnaire just by writing out the entire link in full as well. It is essential, that the link starts with “http://”, “https//” or “www.”. The link then will be automatically acitvated and will get “clickable”.

Just write out the link in full:

Hyperlink I


In the running survey the link then will be automatically activated (the link will always be opened in a new window):

Hyperlink II


The use of HTML anchor-tags (<a href=””></a>) is not possible (but some formatting still can be done).

Link email addresses

Just add the email address entirely to the text (it must contain the “@-sign”). The procedure of the first paragraph (link a word or sentence) cannot be applied for email addresses.

Email address hyperlink


The email link automatically opens a new message in the respective standard program for emails.

The automatic activation of hyperlinks and email addresses is only available for paying customers.

How can I avoid multiple participation?

In contrast to qualitative surveys, e.g. interviews, it is quite difficult to avoid multiple participation in online surveys. Especially when the survey will be released publicly and thereby will be accessisble for anybody in the internet.

Allow multiple participation

In some surveys it does make sense to allow multiple participations. E.g. if an interviewer collects and enters the answers manually and does not publish the survey link, but still wants to benefit from the automatic evaluation.

Reduce multiple participation

Generally it is hard to completely avoid, that certain participants answer your survey multiple times. Basically our survey tool is able to save the IP address and the respective session-ID of each participant and to set cookies. Therefore if somebody uses another computer and opens the survey link again, the system does not know, that this person has already participated. Nevertheless there are various options to protect oneself from unrequested multiple participation resp. to reduce them.

Reduce multiple participation by locking the participants browser session ID and setting a cookie (recommended and standard default)

The browser of a participant communicates an unique session-ID to our system, which will be recognised by a repeated try to anwer the questionnaire. Thereby the access will be denied. Furthermore our system sets cookies, which allow us to recognise a participant, even though the session-ID could have been changed.

Advantages:

Avoids the majority of simple tries to answer the survey again. Additionally this method is very reliable, as the sytem barely identifies a multiple participation mistakenly.

Disadvantages:

This protection can be bypassed very easily, if somebody knows how the session-IDs and cookies work. E.g. by using another browser (the session-ID changes and cookies have not been set yet) or computer.

Lock the participants IP address

Hereby the IP address of each participant will be stored and locked for any further participations.

Advantages:

Safe protection against multiple participation and tougher to envade.

Disadvantages:

Lots of companies externally use the same IP address for all their employees. This means, if one person of a company has already took part in the survey, all other employees cannot participate anymore, because the IP address of this company is locked. Thus this method involves the risk that some people are unjustly excluded. Additionally this protection can be avoided by using another computer (with different IP address).

The use of individual survey links

To guarantee the exclusion of multiple participations by 100% you have to use individual survey links. This method requires, that each recipient has to be contacted personally, as each person receives an own, individualised link. You will find more information about this method in the following link: Create individual survey links. Another option would be to use our internal email distributor.

Advantages:

The securest method to avoid multiple participation. Furthermore you are able to track your participants. Thereby you are able to assign the collected responses to the particular participants (provided that you do not conduct an anonymous survey) and to send targeted reminder emails.

Disadvantages:

The most time-consuming method, as each participant needs to be contacted personally (e.g. with a mass mailing programm). But with our email distribution no problem!

Define conditions to show/hide parts of a survey and/or questions

You can design your questionnaire more dynamically by defining, which pages or questions should be shown or hidden under which conditions.

Just click at a respective page or question, that needs to be shown or hidden depending on the given answers, on the button “display conditions“. Thereby a menu pops-up, that allows you to define conditions, under which the requested action (show/hide page or question) should be executed.

Display conditions I

Now you can choose the answers (yellow buttons)  in the previous question, which should lead to the before defined action (show/hide). It is essential, that the affected questions are not on the same page. Otherwise the before mentioned yellow buttons will not appear and the display conditions cannot be defined.

Display conditions III

In the above mentioned example the page will be only shown, if the previous question is answered with “yes”. In the case a participant selects “no”, the page will be skipped and the following page will be shown instead.

Furthermore you can also define advanced display conditions based on dynamic contents or URL-parameters.


Embed videos in a survey

You can easily embed videos from Youtube.com, Vimeo.com, etc. in a survey.

1. Just visit the respective site, whereon the video is available. Depending on the provider, you find the option “Share” or “Embed”. Please see an example below from YouTube:

embed video I


Beneath the video in “Share > Embed” you will find the so called “iframe” -Code:

<iframe width=”420″ height=”315″ src=”//www.youtube.com/embed/q1dpQKntj_w” frameborder=”0″ allowfullscreen></iframe>


2. Just copy the mentioned code and paste it into your survey. Use the question type “Text” for this purpose.

embed video II


That’s it! The video now will be displayed in the questionnaire.

embed video III


Import survey results into SPSS

You can also evaluate your results in IBM SPSS Statistics. Here is a step-by-step instruction how the survey results can be imported into SPSS.

1. Download the results as a CSV-file.

I


Important note: Possibly the CSV-file will be automatically started in Excel (or the like) after downloading it. It is essential, that the file is closed while importing it into SPSS.


2. Please start SPSS.


3. Select “More files” and click on “OK” subsequently.

PS: If this wizard does not appear after starting SPSS, choose “File > Open > Data…”.

II


4. Select “Text (.csv)” in “Files of type” and look for the CSV document, which was downloaded in step 1. Afterwards click on “Open“.

III


5. Now the text import wizard should be automatically started. Click on “Next“.

IV


6. Select “Delimited” and “Yes” and click on “Next“.

V


7. The default settings should match. Click “Next“.

VI


8. Select “Semicolon” (untick the rest) and “Double quote” and click “Next“.

VII


9. In the case a notification appears, just click on “OK“.

VIII


10. Continue with “Next“.


VIIII


11. Click on “Finish

X


The import is completed and you should see the results in SPSS now.

XI

How can I publish my survey?

There are several ways to publish a survey:

Send survey by email

The most common way is to contact the potential respondents by email. By activating the survey you will receive a survey link, which can be distributed arbitrarily.

You could also use our internal “Email distribution” with your own sender address.

Publish the survey in the internet

You can also publish your survey in the internet. This can be on a homepage, on Social Media platforms, in forums or blogs, etc. There are no restrictions.

Embed a survey in an existing website

A questionnaire can be also embedded in an existing website. This requires the use of “iframes“. Please contact your webmaster, in the case you are not familiar with it.

Here is an example code based on survey link https://www.esurveycreator.com/s/055583b:

<iframe src="https://www.esurveycreator.com/s/055583b" width="800" height="600">https://www.esurveycreator.com/s/055583b</iframe>

How data security is guaranteed?

Data protection is a central topic for eSurveyCreator.com and is treated with high priority.

What we do

The platform undergoes regular security checks and is developed continously to dare possible threats from the web. All our sites are only accessible on secure connections (256-Bit SSL / https) for both the participants and the administrators. The server of eSurveyCreator is hosted and serviced by a professional third company. Thereby a high degree of security is guaranteed as well. Our regular backup copies are stored at from the internet unaccessible locations.

The collected customer data is generally only available for the customer himself. This data can also be reviewed by system administrators of enuvo LLC – the operator of eSurveyCreator. But we emphasise, as already mentioned in our GTCs and data protection guidelines, that the customer data is not diverted from its intended use and /or is passed on to third parties. We take the data protection seriously and that will not change.

What you can do

The collected data remains on our platform as long as you want. In other words a closed survey can be extended anytime to get access to the survey results again. In the case you want to remove the data irrevocably, you can simply delete the survey in the user menu.

We have never made any negative experiences in regard of our data protection and we have never been informed about any data leaks in our system. Whereof it is assumed that they do not exist.

Automatic email notifications after a completed participation

For running surveys automatic email notifications can be defined, which will be executed as soon as a participant will have completed the questionnaire. This function is usually used to inform the administrator about a new participation, to advise the follow-up team that a customer wants to get in touch, to thank a participant for completing the survey, etc.

The email notifications can be defined in “Settings > Email notifications“.

Email notifications menu

Per rule one displayed sender name can be defined. You can also decide, who the recipient of the message should be. This either can be a fixed or a dynamic email address, which was entered by a participant answering the questionnaire or which is stored in the dynamic content.

Example email notification

In order that an email address of a participant can be used (e.g. to confirm the successfull participation), the questionnaire needs to contain an open question (single-line text box), where the respondents are asked to enter their email address. The allowed entries for this element need to be restricted to “Only valid email addresses”.

Only valid email addresses

Situational use

Some of the notications should be sent after each participation. Others underlie certain conditions: Per rule one or more conditions can be defined, under which the notification will be sent. In the following example the email will be only distributed, if a respondent answers the above question with “yes”.

Email notification rule I   Email notification rule II

Send results

You can also send the results of a respective participant (e.g. for follow-ups, etc.). For this purpose the keyword [RESULT] needs to be integrated in the text (incl. square brackets). The term [RESULT] will be automatically replaced by a link while sending the email, which directs the participants to their results.

Send results

Email notifications in multilingual surveys

In a multilingual survey each participants should get an email notification according to his language selcetion. For this reason it can be defined, if the created message should be sent to everbody or only if the participant has chosen a certain language.

Tip: It is advisable to create an email notification per language.

Email notification per language

The use of the automatic email notifications is available with the product “Pro” and higher.

Reopen a completed answer sheet

Participants, who receive an individual survey link, e.g. by being contacted through our internal email distribution service, can only participate once in a survey (unless the settings will be changed accordingly). Once a respondent has completed the questionnaire, changes can not be made anymore. In the case a participant still wants to adjust his/her answer sheet, you as the administrator of the survey can reopen an already closed participation. In “Evaluation > Show/modify/delete answer sheets” the respective answer sheet can be selected and reopened by clicking on “reopen a closed participation“.

reopen completed participation

The participant can now use the same link again to be able to click through the survey. Already given answers are displayed and can be changed at will.

View sent invitation emails

When you have sent the invitation emails via our email distribution tool, you are able to view the actually sent message per recipient.

In “Email distribution > Enter recipients” you see, how many times each email address has been contacted so far. By clicking on the respective number (1x, 2x, etc.) in the column “Sent”, the sent message will be displayed right below.

Sent emails

Change default values for the export of the survey results

In “Evaluation > Change default values” you have to possibility to define individual values for all closed responding possibilities.

Change default values

The newly defined values replace the default values of eSurveyCreator.com. They will appear in the Excel-/CSV-export.

Change default values III

In the above mentioned example the value “1” is assigned to the answer “yes” and the value “0” to the responding possibility “no”. Empty fields keep the same value as before. In the raw data export it looks the following:

Changed default values


This way the export of your survey results can prepared according to your wishes in advance, so that you can minimize the effort afterwards.

Interrupt participation and continue later

Long and extensive surveys can lead the participants to leave the questionnaire before having completed it, as e.g. they do not have the time to continue.

To avoid having incomplete answer sheets due to this reason, there is the possibility to resume a participation afterwards. While responding to the questionnaire the participants can read off their individual resume code in the top right hand corner of the screen. This can be used for the continuation of the participation later on.

Resume code I


The code can be entered in the open text field right above the questionnaire when opening the survey link again.

Resume code II


After pressing the arrow button the participant will be forwarded directly to the page he/she left the questionnaire before. E.g. therewith your participants can start answering the questionnaire at work and finish it at home later.

Hint: In the case you are using our internal email distribution respectively individual survey links or TANs, the before mentioned procedure is not necessary. As each participant has his own personal link or password, the system automatically recognises each respondent anyway.

Can I format text?

You can format text in your questionnaire as follows:

Bold

Enclose the content that should be bold with <b> and </b>.

Example: This sentence should be bold from <b>here to here</b>.

Becomes: This sentence should be bold from here to here.

Italic

Enclose the content that should be italic with <i> and </i>.

Example: This sentence should be italic from <i>here to here</i>.

Becomes: This sentence should be italic from here to here.

Underlined

Enclose the content that should be underlined with <u> and </u>.

Example: This sentence should be underlined from <u>here to here</u>.

Becomes: This sentence should be underlined from here to here.

Combinations

Those formats can be combined as well.

Example: This sentence should be bold, italic and underlined from <b><i><u>here to here</u></i></b>

Becomes: This sentence should be bold, italic and underlined from here to here.

Please ensure that the order of the markup language is adhered correctly, as shown in the above mentioned example.

Formatting of text with CSS

Users, who are familiar with CSS, can format text directly with Styles as well. To do this, simply use the tag <span>TEXT</span>.

Example: This <span style="font-size: 20pt; color: red;">word</span> should appear in red and be displayed in font size 20.

Becomes: This word should appear in red and be displayed in font size 20.

Distribute your emails directly with eSurveyCreator.com

The email distribution via eSurveyCreator.com is quite simple and it allows you, to achieve a maximum response rate with minimum input.

After creating and activating your survey, you will be able to enter all the information in the tab “Email distribution”.
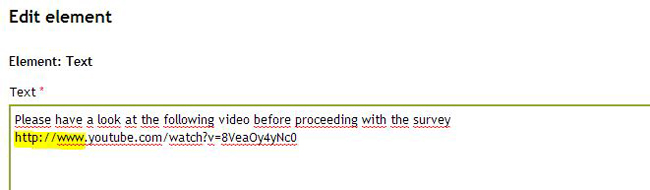
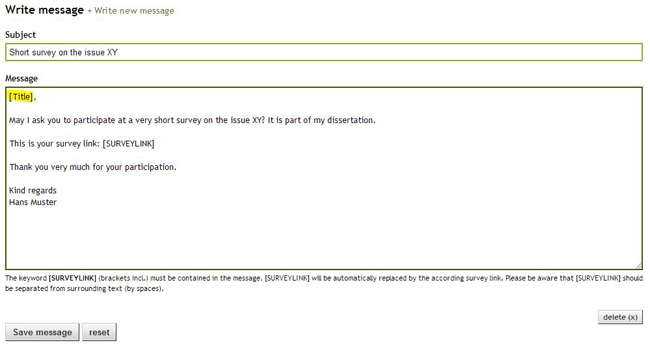
1. Write a message

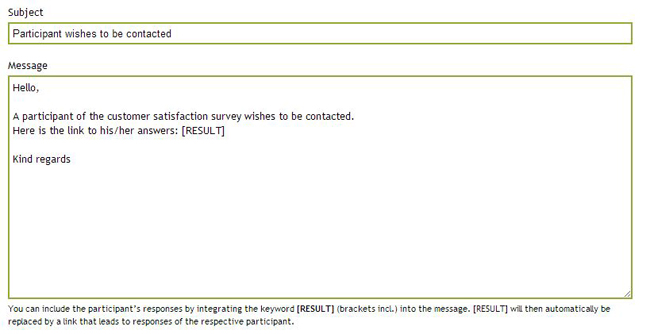
Here you can write the message for the recipients of your email. Please be aware, that the term [SURVEYLINK] needs to be included. This keyword (incl. square brackets) will be automatically replaced by the respective survey link by executing the mass distibution.

You can create any number of different messages (depending on the recipient group).

write message

Please note that the keyword [SURVEYLINK] has to be detached (not directly aside other content) and has to be separated with a space from the rest of the text.
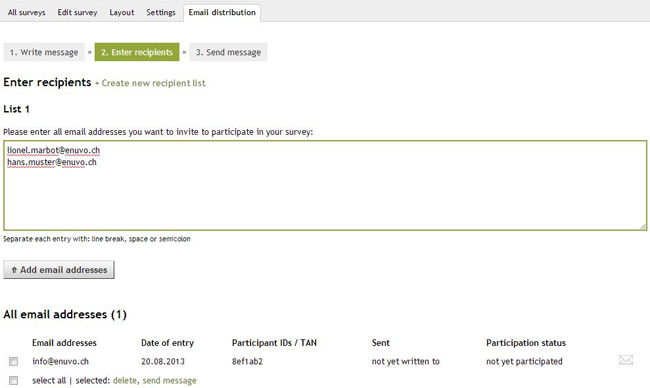
 

2. Enter recipients

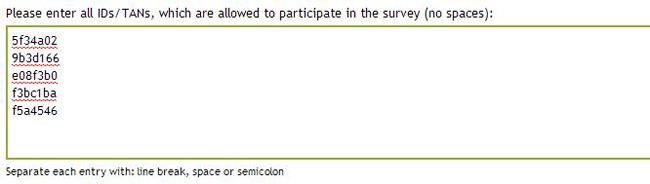
The recipients of your message can be entered in the open text box. You just have to separate the email addresses wtih line break, space or semicolon.

It is possible to create as many different lists as you like. By using diverse recipient lists you are able to design your mass mailings individually (e.g. for a formal message and for a message to your friends).

enter recipients size


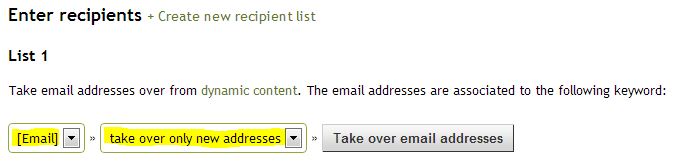
Take email addresses over from dynamic content

If you use dynamic contents, you can automatically take over the email addresses with just one click.

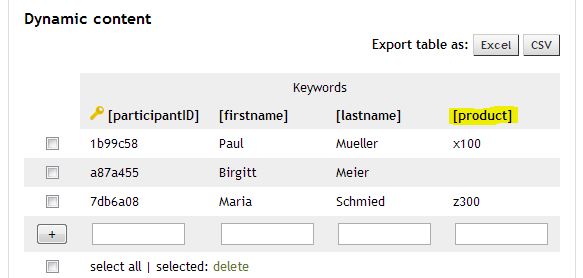
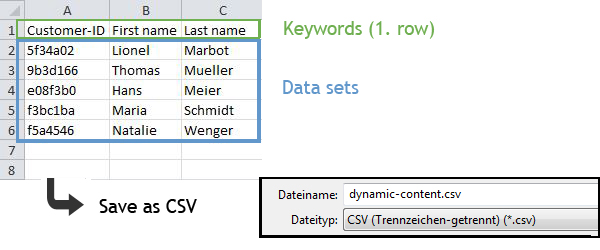
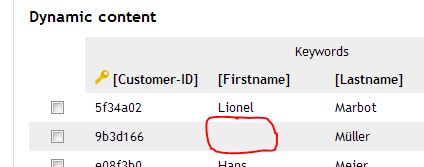
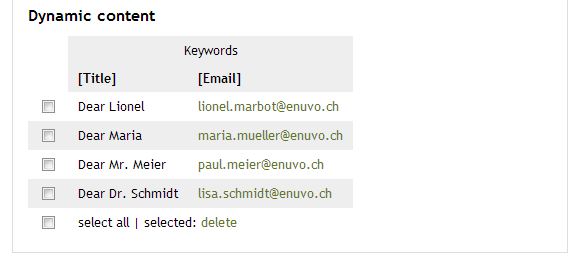
Supposing this is your dynamic content,

recipients dynamic content


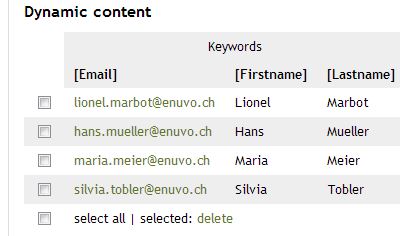
you can select the keyword [Email] and click on “Take over the email addresses” in “Enter recipients”.

take over email addresses

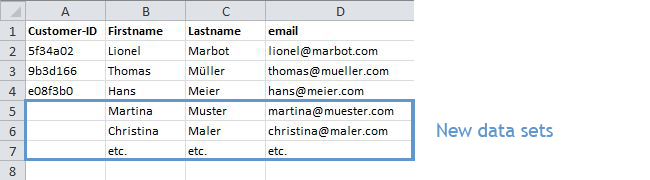
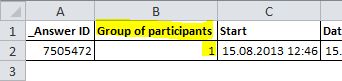
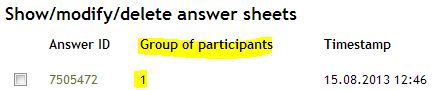
This way all the single rows of the dynamic content will be automatically linked with the answers of the respective participant in the evaluation. In the export of the survey results you will find all the responses as well as the dynamic content listed per participant. Please see the example below:
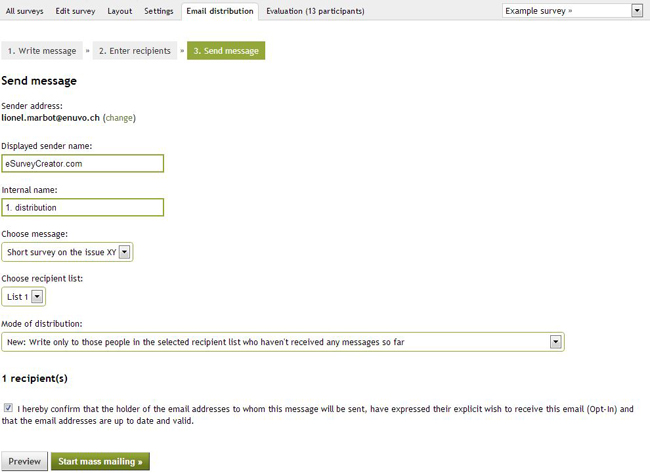
Dynamic content raw data export


3. Send message

Enter a short description of the distribution (internal name), select a message (in the case you have several messages), which should be sent and choose the recipients (recipient list), who should be contacted.

Furthermore you can pick a “mode of distribution”. You have three different options:

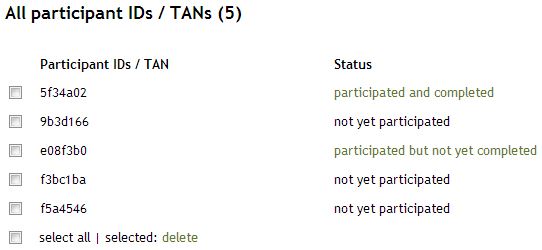
All: Write to everyone in the chosen recipient list

Reminder Email: Write only to those people who have already received a message but have not yet participated in the survey (until the end)

New: Write only to those people in the selected recipient list who haven’t received any messages so far

Send message

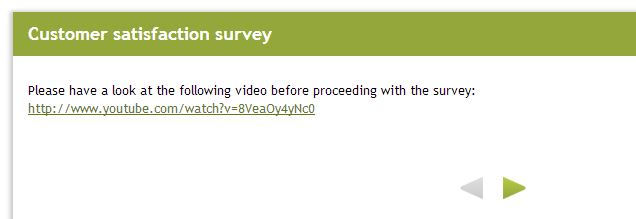
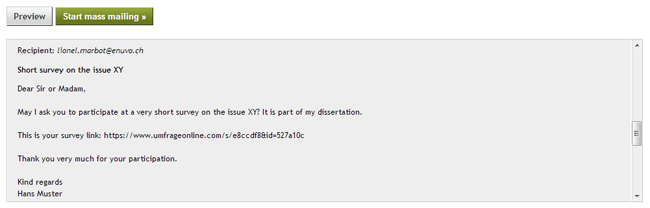
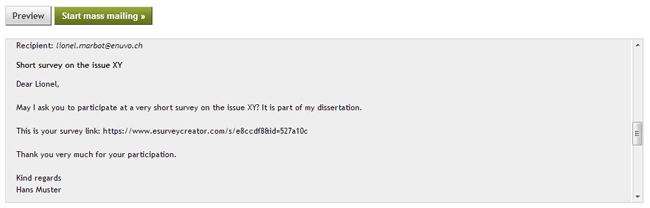
Right before the start of the mass mailing you can have a look at the preview of the emails.

Preview email

After you have activated your survey and have observed all instructions in “Email distribution”, you can start the mass mailing.

Subsequently the distribution will be moved to the waiting queue. It will be executed as soon as possible (depending on the backlog it can take from a few minutes up to several hours). You will get an automatic email notification once the distribution is completed.


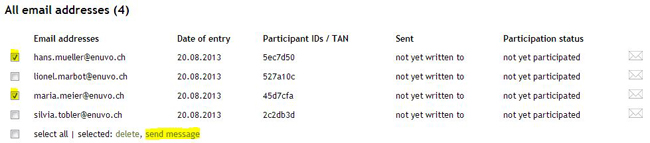
Contact single recipients of a list

You are not only able to send your invitation emails to an entire list of recipients. It is also possible to choose single participants and to contact them individually. Such individual distributions can be done in step 2 of the email distribution process (Enter recipients). You just have to select all the recipients who should be contacted and then click on “send message” at the bottom of the list. If you want to send an email to a single person, you can simply click on the respective envelope on the right side of the screen.

Single contacts


Personalised emails

Do you want to contact your participants personally? E.g. to address the participants by their names? This is very easy as well. Please see this simple example:

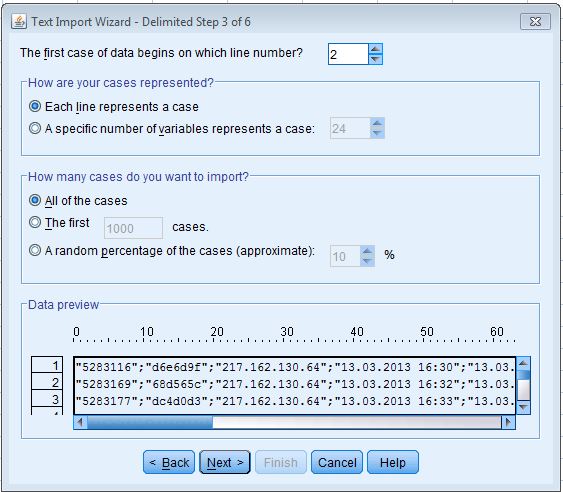
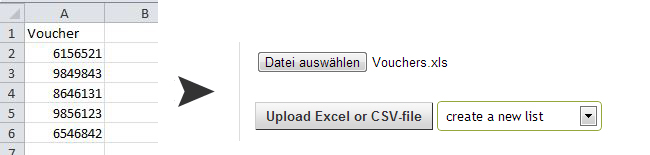
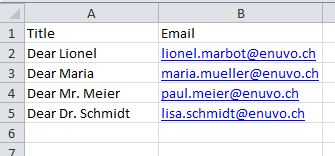
Just create an Excel- or CSV-file with the email addresses of the partcipants and add the required columns. In this example the column “Title” will be used to address the recipients personally. You can use as many different columns as you like.

Personalised Excel list


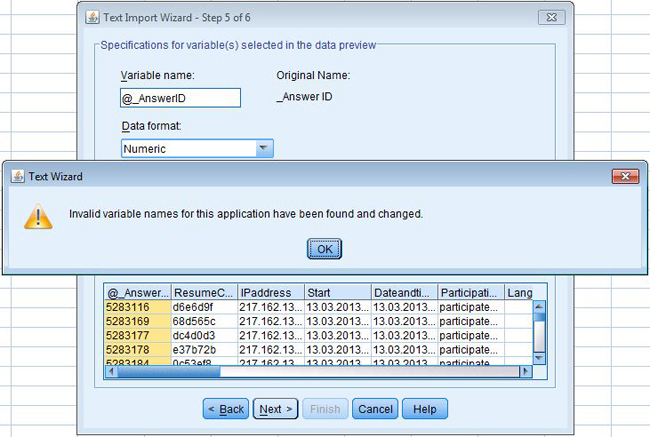
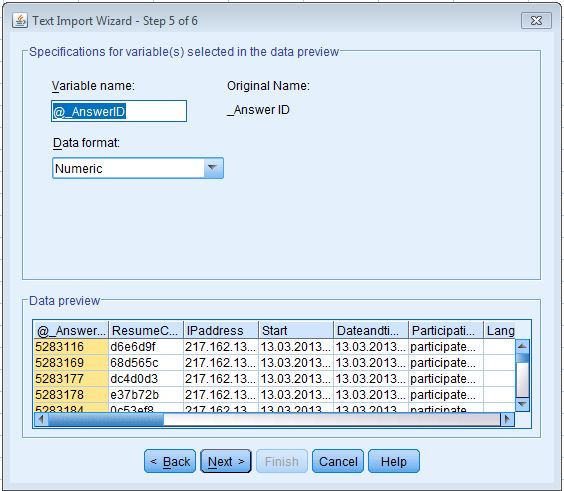
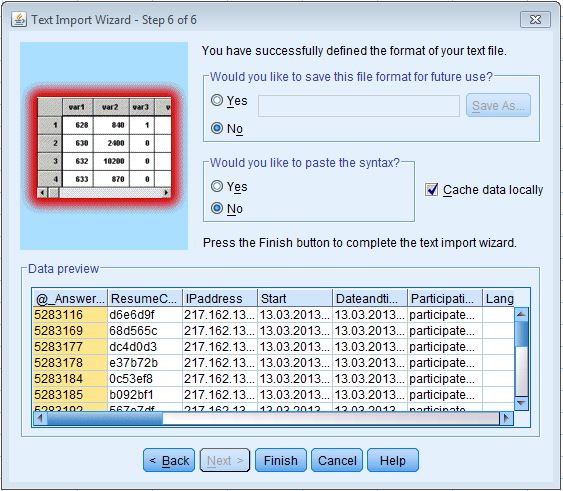
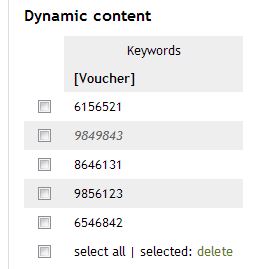
This list can be uploaded in the “settings” of you survey in“dynamic content”. The keywords [Title] and [Email] are well emphasised.

Personalised dynamic contents


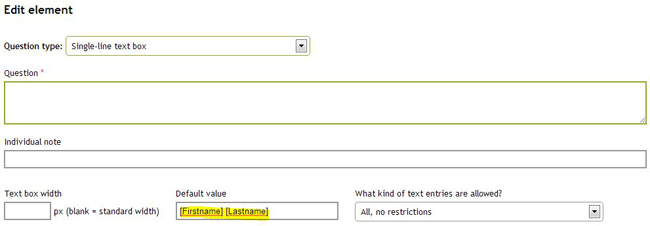
Now you can write a message in “Email distribution”, which will be sent to the potential participants. As title you can use the keyword [Title]. It will be automatically replaced by the data you definied in the Excel file you have uploaded before.

Title in write message


As a next step the email addresses of the dynamic content will be adopted. For that purpose just select the respective keyword with the email addresses and click on “take over”. In the above mentioned example it is the term [Email].

take over email addresses from dc

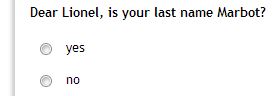
Now the result can be seen in the preview of the mass mailing. The keyword [Title] was successfully replaced by “Dear Lionel” (as primarily defined). So each recipient will receive a personalised message.

Preview personalised email II

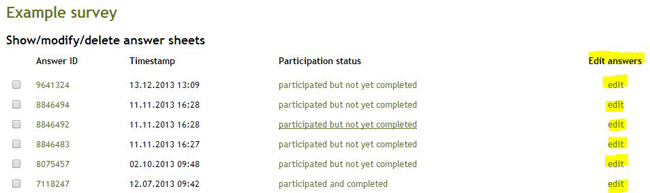
The sent messages can still be reviewed afterwards: Show sent invitation emails

Hint: The use of dynamic content respectively personalised emails is only available with the product “Pro” and higher. However the email distribution can be used with all our products.

Copy single elements, pages or entire surveys

You can copy single question elements as well as entire pages very easily. Each element respectively each page has its own “copy button“.Copy element or page

After clicking on one of those buttons you can determine where the copy should be inserted.

Copy & paste

The copy can be pasted within the same survey. You can choose the exact place where it should be inserted (yellow circles). It is also possible to transfer a copy to another, editable survey (red circle). Therefore you need at least one other survey in your account, which is not active and has not expired.

You are also able to duplicate an entire survey:

Duplicate survey

The status (active, interrupt, closed) of the questionnaire that needs to be copied is irrelevant. Even an expired survey can be copied, edited and relaunched. But the results of the original survey will not be adopted.

Define display conditions on the basis of dynamic contents or URL parameters

In addition to the logical workflows and to the display conditions based on participant responses it is also possible to define advanced display conditions (“Advanced settings” in the respective display condition).

Display conditions according to dynamic contents

If you use dynamic contents for your survey, you can utilise them as basis for display conditions. E.g.: Supposing you have uploaded the following information about your participants.

As shown in this table not every single participant (row) was assigned a product to. Advanced dynamic content

Now if your questionnaire contains a question/page, which e.g. should only be displayed to participants who have a product, you can define it as follows:

Display conditions dynamic content

In “display conditions – advanced settings” you can set up, that this question/page should only be shown, if “[product]” != (not equal) is “empty”.

Display conditions according to URL parameters

Provided URL parameters can be also used as basis for display conditions. Those parameters can be freely selected (except for code, he, id and lang). They need to be added to the survey link as follows:

Example of a survey link: https://www.esurveycreator.com/s/1a2b3c

Add the parameter “product”: https://www.esurveycreator.com/s/1a2b3c&product=x100

The parameters has to be added with the symbol “&“. Parameter “product” received the value x100.

It is also possible to include several parameters: https://www.esurveycreator.com/s/1a2b3c&product=x100&newcustomer=1

Thereby we have the parameters “product” = x100 and “newcustomer” = 1, etc. In the below mentioned example the question/page should only be displayed in the case the parameter is “newcustomer” = 1:

Display conditions URL parameter I

On the left side you have {newcustomer} (URL parameters have to be written in curly brackets), on the other side the value 1 and “==” as comperative operator. By designing the questionnaire dynamically this way, you only have to use one single survey and not a different one for each participant/participant group. You can simply send each participant group an adjusted survey link.

Meaning of the comperative operators

< less (only numbers)

<= less or equal (only numbers)

== equal (exact comparison, space too)

>= greater or equal (only numbers)

> greater (only numbers)

!= unequal (exact comparison, space too)


Question and answer PIPING in your questionnaire

Starting from product “Pro” and higher, you can make use of piping functionality in your questionnaires. Piping allowes you to make your online survey more dynamic by reusing a participant’s answer to a specific question in a later question again. Here’s a working example:

piping-example

Note: Question 2 is piping answers from question 1; only the selected answers in question 1 are shown in question 2. Also, it is possible to take up answers in text format again.


How it works (based on above example)

1. First of all, you need to create at least one question we can use as piping reference. Let’s call this the “reference question“.

2. Once you have created your reference question, you must assign it an identifier – a unique name you can later refer to (“visited-cities” in this example):

piping-example-set-identifier


3. We can now create a second question, in which we will take over the selected answers from the reference question. This new question is the “piping question” and must be located in another, subsequent page within the questionnaire.

4. In this question, we will refer to the reference question by using its identifier “visited-cities”. The identifier must be wrapped in double curly brackets: {{visited-cities}}


piping-example-create-piping-question


Done!

That’s all you need to do: Assign an identifier to one question and refer to it with the appropriate placeholder {{identifier}} in another question, text, or wherever you like.

You can even use the new piping question as a reference question for further piping:

piping-example-use-piping-question-as-reference


Further piping options

Restrict the number of answers that are taken over

In some cases, especially when using ranking questions, you might need piping only to apply on e.g. the top 3 answers. This can be done by appending the following addon to the placeholder:

{{identifier}}[3]

This addon will take over max. 3 answer from the reference question. Here’s an example:

piping-example-restrict-max-number-of-rows


Alternative text for empty piping

With piping one can replace a placeholder {{identifier}} with a previously given answer. However, if no answer was given, the placeholder is replaced with an empty string. For such cases, it is possible to define alternative text that is shown instead:

{{identifier}}{This is the alternative text.}
or
{{identifier}}[2]{This is the alternative text.}

Just wrap the alternative text in curly brackets and add it right after your piping placeholder (no spaces in between). Here’s a working example:

piping-example-alternative-text


Negative piping

You can also pipe answers that were NOT selected previously. To do so, just add a minus sign between the two first curly brackets:

{{identifier}}

This option is only available when piping into another question. It is not available when piping answers to text.

Dynamic content in the questionnaire

It is possible to integrate placeholders in your questionnaire that are dynamically replaced by dynamic content. Such placeholders can be used for e.g. the personal address of the participants (incl. first and last name) or for randomly distributed vouchers at the end of a survey.

How do I setup dynamic content?

In the settings of your survey you will find the tab “Dynamic content”. After activating this function, you can start entering dynamic content by uploading an Excel- or CSV-file.

The first row of the file must contain the keywords (that are used as placeholders in the questionnaire). Every keyword (column description) must be unique. Subsequent rows must contain your data.

Data sets I

Simply upload your data file into the “Dynamic content” section.

Personalised output of data sets

Notice: Alternatively to the manual determination of the participant-IDs, dynamic content can also be embedded automatically in connection with the email distribution via eSurveyCreator.com. In this regard please read the following article: Automatic distribution of invitation emails in combination with dynamic content

Additionally, an optional column can be defined as “Participant ID”, which can be used to individualise survey links (see the instructions personalised survey links). So if you use individualised links for your survey and you have also created such a column in the dynamic content, the system automatically recognises that the participant with the ID “XY” has to receive the data sets from the row with the same ID “XY”.

Keyword that containts participant ID + data sets

Thereby the placeholder [Firstname] will be replaced by Lionel, and [Lastname] will be exchanged by Marbot in the questionnaire of the participant with the survey link https://www.esurveycreator.com/s/123456&id=5f34a02.

Thus, the following template…

First name, last name  

will be displayed to the participant with the ID 5f34a02 as follows:

first name, last name replaced  

Dynamic content can also be used as predefined text in text boxes. Based on previous example, you can just add the placeholders [Firstname] and [Lastname] to the “default values” of the question types “Single-line text box” or “Multi-line text box”. Those keywords will also be replaced by the corresponding data sets in the questionnaire.

Placeholder default values

Hint:

In case that a keyword should return an empty data set (e.g. if you do not have this information), you can define an alternative text that is shown instead. This alternative text has to be added directly after the keyword (no space) within curly brackets. E.g. if your salutation line in the invitation email looks like the following: “Dear [Firstname]{customer},” and the dynamic content looks according to the below mentioned example…

   Empty data set

the participant with the ID 5f34a02 will be addressed by “Dear Lionel,…”. For the participant with ID 9b3d166, however, the invitation email will start with “Dear customer,…” (since no “Firstname” is defined).

Add new data sets

New data sets can be added directly beneath the existing list. In case you are using automatically generated participant IDs, the first column can be left empty. By adding email addresses from dynamic content to the recipient lists of the email distribution, random participant IDs will be automatically assigned to each recipient.

Add new data sets

Another option is to export the existing list as an Excel- or CSV-file (top right corner of the dynamic content) and to add the new data sets to this downloaded list. This alternative is way more convenient to add larger amounts of data. Here you can also leave the first row empty, when you do not use your own participant IDs.

Add new data sets Excel

As soon as the list is up to date, it can be saved and be uploaded again. When uploading the updated file, please choose the option “overwrite selected list“.

overwrite a new list

Random output of data sets

E.g. if you want to award the participants randomly with a voucher for having answered your questionnaire, you can upload a spreadsheet, which contains all your vouchers.

Create a new list vouchers

In the settings of the new list you can define, that each voucher can only be used once among all participants.

Data sets can only be used once among all

As no column is linked to a participant-ID, an arbitrary data set (voucher) will be given out by each occurrence of the keyword [Voucher] in the questionnaire.

Used data sets won’t be used a second time. The already displayed data sets will be displayed in grey and italic.

Used voucher

Create multilingual surveys

If you want to conduct a survey in various languages you do not have to create a survey for each language separately. An existing questionnaire can be translated into different languages.

Procedure

First you should completely build the questionnaire in one language (template). You better not start with the translation until the main questionnaire has not been created entirely.

Enable multilingualism

The multilingualism can be activated in “Settings > Languages > Multilingual survey“.

Enable multilingualism II


Enter a new language

There are two different ways to enter a new language:

Default language: Select one of the default languages in the dropdown and click on “Save new language”:

Save new language II

By choosing a default language all predefined texts (error messages, etc.) will be automatically translated. When the option “Automatic translation” is activated, the whole questionnaire is automatically translated using “Google Translate”. You can modify these translations afterwards.

Other languages: If the needed language is not one of our default ones, you can add it manually.

Add other language

That way no automatic translation is done. You’ll have to enter all translations yourself (incl. error messages, etc.).


Translate the questionnaire

Highlighted with a grey background is the text from your template questionnaire. Just below you can enter the appropriate translation.

Translate questionnaire

Content that does not need to be translated (e.g. numbers) can be copied with a simple click on the down arrow on the left. Text fields already containing text will not be affected.

Autofill empty boxes multilingual survey


Please do not forget to save the entered translations (at the bottom of the page).

Save translation


Translation by a third party

If you do not want to translate the questionnaire by yourself, you can grant third parties access to your translations via a translation link.

Allow access for external translation II

With this link third parties only get access to the translation site and solely to the respective language. The questionnaire itself cannot be changed. A different unique link is generated for every language.

Unchecking this option revokes access immediately.

PS: By default the template language is shown as the basis of the translation (English in the above mentioned example). Sometimes it is required that another language is used as template (e.g. a questionnaire was created in English (template) and then translated to German. Now the questionnaire needs to be translated from German (and not from English) to French. For this purpose the language code of the respective language has to be added to the translation link (e.g. www.esurveycreator.com/translation/1234567-hijklmn&language=2). The number “2” in this code represents the language code, which can be found in the URL by selecting the required language.

Language code I


Language selection for the participants

As soon as the above mentioned steps are completed, the language selection will appear at the beginning of the questionnaire.

Select language


Preselect a language

Do you already know the language of your participants? Then you can modify the survey link in order to skip the language selection and directly show the correct language instead.

Let assume that this is your survey link: https://www.esurveycreator.com/s/1234567

With the add-on (&lang=n) you can define the language that has to be used, e.g.: https://www.esurveycreator.com/s/1234567&lang=1

In the below mentioned example the number “1” stands for “English” and the number “2” for “Deutsch”. The correct language code can be found in “edit survey” (in the URL), after having chosen the respective language:

Language code II

Now, when a participant opens the modified survey link, the language selection is skipped and the questionnaire automatically starts with the first page of the questionnaire in the selected language.


Evaluation

The chosen language of a participant can be retrieved in the raw data export (e.g. in Excel) of your results.

Language in raw data export

It is also possible to filter by language in the online evaluation.

Filter by language


Allow participation only with a valid TAN

When conducting a survey with a closed group of participants (e.g. employee survey) one sometimes have to make sure that only authorised people are able to participate. Additionally, those people should not be able to answer the questionnaire more than once.

Basically, there are two ways to achieve that: Via direct mass mailing via eSurveyCreator.com and/or via the distribution of TANs (both options can be combined as well). This article addresses the latter option.

In “Settings > Participant IDs / TAN” you can define that one can only participate in the survey entering a valid TAN.

Participant ID TAN

You can either enter all IDs/TANs manually or you can let them be generated automatically. All TANs can be exported as an Excel-/CSV-file (e.g. for the further distribution to all employees).

Using this option, every participant will have to enter their own valid TAN in order to being able to participate in the survey.

Access code

By default, using a TAN, one can only participate once. You can however change this in the settings of your survey to accept multiple participations. If a respondent interrupts his/her participation, he/she will be able to continue afterwards at the same point he/she left the survey by using the same TAN again.

Can a survey be conducted anonymously?

Yes, it is possible to conduct anonymous surveys and not being able to match collected results to individuals. This can be defined in the “settings” of the respective survey.

When using our  automatic “email distribution” respectively “participant-IDs / TANs”, collected results are automatically linked to the respective email address or TAN of the participant. By enabling the option “Anonymous survey” this connection will be suppressed (to ensure anonymity).

Anonymous survey

Caution: This setting can’t be undone!

Furthermore you can deactivate the saving of the IP-addresses (deactivated by default).

Save IP-adress

Use cross tabulation in your online results

Cross tabulations can be done in the automatic evaluation of your survey. To do so, you just have to click on the answer you want to focus on.

For example, having a gender question in your questionnaire, you can easily narrow down the evaluation to only female participants.

Cross tab gender IIBy clicking on “female”, only answers of female respondents will be displayed. You can define as many filters as you like, e.g. additional filters for the age, marital status, or whatever other questions you have in your questionnaire.

Filtered responses

In the top area of your evaluation you will see your active filters listed. They are also shown in the affected element/question. With just one click on the orange arrow directly aside a respective responding possibility the filters can be deleted.

Define logical workflows (skip logic)

According to the principle of “Don’t make me think” a questionnaire should be as simple and easy as possible. Not only will your participants benefit from a well-structured survey: Response rate might increase and that is great for you too.

The use of logical workflows (skip logic) avoids that participants need to answer irrelevant questions. E.g. when you ask in a questionnaire if the participant owns a car and he answers “no”, one should not be asked for the colour of his car in the next question. Logical workflows help to skip irrelevant questions on the basis of previously given responses.

Redirections based on responses

This feature can be used for closed questions with single selection.

What products do you use III

At a given question just click on “Edit logical workflow” and add a redirection rule according to your needs. Thereby you can make sure that only relevant questions are shown to the participant based on their previously given answers.


Once being set, the active redirections will be shown in the edited question:

What products do you use logical workflow

In this example no specific redirection is defined for the responding possibility “Product X”. Therefore, all participants who choose “Product X”  will continue with the next page of the questionnaire as normal.

By choosing “Product Y” participants will be redirected to “Page 3”. “Page 2” will be automatically skipped.

If somebody selects “None” he/she will automatically get to the end of the survey, as he/she does not belong to the target group.

Set redirections based on visited pages

Beneath every page (assuming that you have more than one page in your questionnaire) you’ll find the same functionality as above, with the slight difference, that they refer to the page and not to given answers.

Logical workflow page

This also helps you to guide your participants through your questionnaire:

skip-logic-based-on-visited-pages

Those “Site-redirections” will only be executed if no other logical workflows are defined within the same page (on questions).

A well-conceived questionnaire guides a participant through a survey, without showing him irrelevant questions. Please remember that the questionnaire needs to be separated into several pages before the redirections can be used.

“Display conditions” are useful as well to define such redirections.

Create individual survey links

When conducting a targeted survey, like a customer satisfaction survey, potential participants will be contacted individually. To be able to track those participants without asking for personal details in the questionnaire, survey links can be individualised.

Hint: By doing the email distribution directly with eSurveyCreator.com, the survey links will be automatically individualised. Thereby they do not have to be created manually. Here you will find all information about this feature: Send the invitation emails directly via eSurveyCreator.com

Personalised survey

Your first step is to create your questionnaire and activate it. By activating the survey, you will receive the general link to your survey, e.g. looking like this:

https://www.esurveycreator.com/s/1a2b3c

Now this link can be individualised with an arbitrary add on.

&id=46e2cfr

The “id” can be chosen randomly, but it must only contain the following characters: a-z, A-Z, 0-9, dash and underscore (no spaces). Examples:

https://www.esurveycreator.com/s/1a2b3c&id=qe83kL

https://www.esurveycreator.com/s/1a2b3c&id=8k4jcd

https://www.esurveycreator.com/s/1a2b3c&id=o34knc

etc.

With a personal survey link a participant can only participate once, irrespective of the IP-address and the Session-ID. The participant will be able to interrupt the participation by closing the browser and to continue later at the same point they left the survey before by reopening the survey link. Furthermore the chosen ID can be found in the evaluation of the survey. Thereby you are able to assign the collected answers to the particular participants and to determine who has already answered the questionnaire. This information can be very helpful for the distribution of reminder emails.

The use of individual survey links requires that you know your participants, since everyone must receive their very own link.

Closed group of participants

It is possible to conduct a closed survey, which is only accessible to a limited group of participants. This can be done by activating the function “Allow participation exclusively with a personal link or valid TAN” in the tab “Participant IDs / TAN” in the settings of the survey.


Participant IDs TAN

When this option is not activated, it is still possible to participate in the survey with the general survey link. In the same menu the “IDs/TANs” can be defined, which allow the participants to answer the questionnaire. The “IDs” underlie the same restrictions as mentioned before (individual links). They can either be created manually (without “&id” at the beginning):

Enter IDs, TANs Or they can be generated automatically:

Generate TANs

On the same page all entered IDs/TANs are shown with the corresponding status (not yet participated / participated but not yet completed / participated and completed).

Status Participant IDs

The data can be exported as Excel- and CSV-document. Furthermore, by clicking on the participation status, you can see the full results of this very participant only.

Split the participants into groups and evaluate the answers group-specificly

Sometimes you want to group the participants of your survey or you need to know, where all the different answers came from. Should you distribute your survey link e.g. by e-mail, with posts in blogs and forums as well as by regular mail, it may be interesting to analyse the responses of those groups (e-mail, web, regular mail) separately.

In order to group the participants you have the possibility to modify the original survey link with an arbitrary number (1-255). This extension can be found in the evaluation again.

Modify survey link

Imagine you receive the following survey link for your survey:

Your survey link

You can now slightly modify it by attaching the following add-on: &he=1

You can chose numbers from 1 – 255.

The above link should now look as follows: https://www.esurveycreator.com/s/ff250bb&he=1

This way you can send/share for each participant group one individual link:

By e-mail: https://www.esurveycreator.com/s/ff250bb&he=1
Posts on blogs and forums: https://www.esurveycreator.com/s/ff250bb&he=2
By regular mail: https://www.esurveycreator.com/s/ff250bb&he=3

Find group code in the results

Afterwards the results of the survey can be filtered very easily by groups of participants in the online evaluation.

Filter by groups of participants II

All defined codes (1, 2, 3, etc.) can be also found either in the Excel and CSV result export:

Group of participants Excel

as well as in the overview of the individual answer sheets:

Group of participants smdas


Thereby you are able track the participant groups. If you want to track a single participant, you can create personalised survey links.


Share your survey results via a simple link

You can easily share your collected results with all interested groups of people by sharing a simple link.

To do so, go to the “Settings” of the concerned survey and scroll down to item “Publish results“.

After having enabled this option you’ll receive a direct link, which you can forward to any third party that may be interested in the survey results. The results are also displayed in real-time.

However, third parties have no possibility to change any of the data (e.g. delete data), why you don’t have to worry.

Welcome to the eSurvey Creator blog!

2011 is a big year for eSurvey Creator. Since beginning of the year, our survey platform is continually evolving and had already its first major update in late April. Some changes can be seen immediately while others hide in the background – we give at all-time our best to improve our online survey tool to make it even better, faster and easier to use!

An novelty is thus this blog, on which you’ll find all future information about our survey tool as well as general knowledge on how to conduct surveys.

2011 is going to be a good survey year!